كيفية تحويل Raspberry Pi إلى صندوق BitTorrent يعمل دائمًا

من المثالي أن يكون لديك جهاز مخصص لعميل BitTorrent الخاص بك ، حتى تتمكن من زرع 24/7. ولكن من الضروري أن يتم تشغيل منصة كاملة وتشغيلها عبر الإنترنت في كثير من الأحيان. أدخل Raspberry Pi.
ذات صلة: دليل How-To Geek لقياس استخدامك للطاقة
تستهلك معظم أجهزة الكمبيوتر المكتبية قدرًا لا بأس به من الطاقة — خادمنا المنزلي المتواضع ، على سبيل المثال ، يستهلك ما يقرب من 200 دولار من الكهرباء سنويًا. من ناحية أخرى ، فإن Raspberry Pi مبني حول معالج محمول ويرشف الطاقة مثل الطائر الطنان. تستخدم لوحة Raspberry Pi الأساسية أقل من 3 دولارات من الطاقة سنويًا وحتى إضافة بعض محركات الأقراص الصلبة الخارجية ، ستظل تحتفظ بتكاليف التشغيل السنوية بأقل من البرجر والبطاطس المقلية.
بالإضافة إلى ذلك ، عندما يتعلق الأمر بتنزيل التورنت ، فإن الجهاز الذي يعمل دائمًا هو الأفضل. باستخدام التورنت ، كلما زادت مراقبتك للسحابة وزرعها فيها ، كلما كانت نسبتك على متتبعك أفضل (حتى لو كنت تتعقب من أجهزة التتبع العامة ، يضمن الجهاز الذي يعمل دائمًا أنك ستكون موجودًا عندما تظهر تلك الملفات النادرة) .
إذا كان هذا يبدو جيدًا ، فاقرأ كما نوضح لك كيفية تحويل Pi الخاص بك إلى آلة تنزيل يتم التحكم فيها عن بُعد تمامًا.
ماذا تحتاج

بالنسبة لهذا البرنامج التعليمي ، نفترض أن لديك وحدة Raspberry Pi مثبت عليها Raspbian ، وأنك قادر على الوصول إلى الجهاز إما مباشرة عبر شاشة ولوحة مفاتيح متصلة أو عن بُعد عبر SSH و VNC ، وأن لديك محرك أقراص USB خارجي (أو محركات أقراص) أضفها له. إذا كنت بحاجة إلى التعجيل في هذه المجالات ، فنحن نقترح بشدة قراءة الأدلة التالية بالترتيب الذي قمنا بإدراجها هنا:
- كل ما تحتاج لمعرفته حول بدء استخدام Raspberry Pi
- كيفية تكوين Raspberry Pi الخاص بك لـ Remote Shell وسطح المكتب ونقل الملفات
- كيفية تحويل Raspberry Pi إلى جهاز تخزين شبكة منخفض الطاقة
كل شيء في البرنامج التعليمي الأول ضروري. البرنامج التعليمي الثاني اختياري (لكن الوصول عن بُعد سهل للغاية لهذا المشروع ، حيث أن صندوق التنزيل هو مرشح مثالي لبناء بدون رأس) ، والجزء الأكثر أهمية في البرنامج التعليمي الثالث هو ببساطة إعداد محرك الأقراص الثابتة وتكوينه يتم تركيبه تلقائيًا عند التمهيد (كما هو موضح في الدليل الثالث).
ذات صلة: كيفية إخفاء وتشفير حركة مرور BitTorrent الخاصة بك
بالإضافة إلى ذلك ، إذا لم تكن معتادًا جدًا على خصوصيات وعموميات إعداد عميل BitTorrent للتنزيل المجهول ، فيجب عليك قراءته. كنت على الاطلاق تحتاج نوعا من إخفاء الهوية وكيل أو نظام VPN في مكان من أجل استخدام تورنت بأمان. الوكيل المذكور في هذا الدليل رخيص وسهل ، ولكن عادة ما تكون VPN الجيدة أسرع وأكثر تنوعًا ، لذا تحقق من هذا الدليل إذا كنت تريد VPN بدلاً من ذلك.
بمجرد مراجعة جميع المواد وتكوين Pi ، فقد حان الوقت للانطلاق في أعمال تحويل Pi إلى وحش تنزيل صامت ومنخفض الطاقة للغاية.
الخطوة الأولى: تثبيت Deluge على Raspbian

هناك العديد من عملاء BitTorrent لنظام التشغيل Linux يستحق النظر ، لكننا نوصي باستخدام Deluge إنه مجرد التوازن الصحيح بين الميزات والبصمة بحيث لا تجد نفسك تتمنى بعد شهر من الآن أنك قمت بتثبيت شيء أكثر قوة.
يمكنك البدء في تكوين Deluge بطرق متعددة ، ولكن ليست كل التكوينات مناسبة لمربع تنزيل Pi بدون رأس. بينما يستخدم معظم الأشخاص عميل التورنت الخاص بهم على سطح المكتب مثل أي تطبيق آخر ، فإن هذا لا يعمل جيدًا لأغراضنا ، لأنه يعني أنه في كل مرة تريد فيها التفاعل مع السيول الخاصة بك ، يجب عليك تسجيل الدخول إلى المربع عبر جهاز التحكم عن بعد سطح المكتب والعبث مع عميل سطح المكتب. إنه يضيع وقتك ويهدر الموارد على Pi.
يمكنك تشغيل Deluge WebUI ، والذي يسمح لك بالوصول إلى عميل Deluge من متصفح على جهاز آخر. لا يزال هذا ليس خيارنا المفضل ، على الرغم من أنه يفتح لك إمكانية استخدام تطبيق هاتف ذكي لعرض Deluge والتحكم فيه (المزيد حول هذا لاحقًا).
نوصي بتكوين Deluge على الجهاز البعيد لقبول اتصالات ThinClient. بهذه الطريقة ، يمكننا استخدام عميل سطح المكتب Deluge الفعلي على جهاز كمبيوتر آخر (سواء كان ذلك بنظام Windows أو Linux أو OS X box) للتحكم في تثبيت Raspberry Pi Deluge. تحصل على جميع مزايا عميل سطح المكتب على سطح المكتب الفعلي ، بينما تحدث كل الإجراءات على الصندوق البعيد.
إذا لم تتمكن من الاختيار بين هذين الخيارين ، يمكنك في الواقع استخدام كليهما جنبًا إلى جنب ، على الرغم من أن الإعداد سيستغرق وقتًا أطول. ما عليك سوى اتباع التعليمات الواردة في كلا القسمين أدناه للقيام بذلك.
الخيار الأول: إعداد Deluge للوصول إلى ThinClient
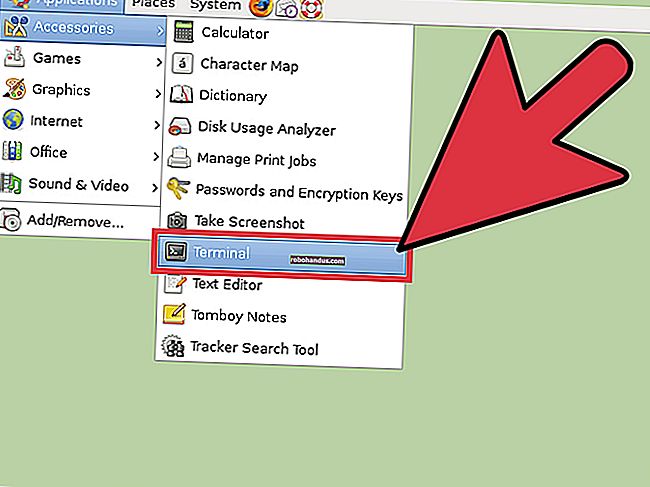
قبل أن تفعل أي شيء ، توقف لحظة لتحديث مستودعاتك وترقيتها. افتح Terminal وقم بتشغيل الأمرين التاليين ، واحدًا تلو الآخر:
sudo apt-get updatesudo apt-get upgrade
بمجرد الانتهاء من ذلك ، حان الوقت لبدء تثبيت المكونات الضرورية لإعداد ThinClient. أدخل الأوامر التالية:
sudo apt-get install delugedsudo apt-get install deluge-console
سيؤدي ذلك إلى تنزيل حزمة Deluge daemon وحزم تثبيت وحدة التحكم وتشغيلها. عند مطالبتك بالمتابعة ، اكتب Y. بعد انتهاء تثبيت Deluge ، تحتاج إلى تشغيل البرنامج الخفي Deluge. أدخل الأوامر التالية:
delugedsudo pkill deluged
يبدأ هذا البرنامج الخفي Deluge (الذي ينشئ ملف تهيئة) ثم يغلق البرنامج الخفي. سنقوم بتحرير ملف التكوين هذا ثم بدء تشغيله احتياطيًا. اكتب الأوامر التالية لعمل نسخة احتياطية أولاً من ملف التكوين الأصلي ثم فتحه للتحرير:
cp ~/.config/deluge/auth ~/.config/deluge/auth.oldnano ~/.config/deluge/auth
بمجرد الدخول إلى محرر نصوص nano ، ستحتاج إلى إضافة سطر إلى أسفل ملف التكوين باستخدام الاصطلاح التالي:
user:password:levelأين userاسم المستخدم الذي تريده لـ Deluge ، passwordهو كلمة المرور التي تريدها ، levelوهو 10 (الوصول الكامل / المستوى الإداري للبرنامج الخفي). لذلك استخدمنا لأغراضنا pi:raspberry:10. عند الانتهاء من التحرير ، اضغط على Ctrl + X على لوحة المفاتيح واحفظ التغييرات عندما يُطلب منك ذلك. ثم ابدأ تشغيل البرنامج الخفي ووحدة التحكم مرة أخرى:
delugeddeluge-console
إذا كان بدء تشغيل وحدة التحكم يمنحك رمز خطأ بدلاً من واجهة وحدة تحكم منسقة بشكل جيد ، فاكتب "خروج" ثم تأكد من بدء تشغيل البرنامج الخفي.
بمجرد دخولك إلى وحدة التحكم ، ستحتاج إلى إجراء تغيير سريع في التكوين. أدخل التالي:
config -s allow_remote Trueconfig allow_remoteexit
ستبدو الأوامر والإخراج المقابل مثل لقطة الشاشة أدناه.

يتيح ذلك إجراء اتصالات عن بُعد بشفرة Deluge والتحقق مرتين من تعيين متغير التكوين. حان الوقت الآن لإيقاف البرنامج الخفي وإعادة تشغيله مرة أخرى حتى تدخل تغييرات التكوين حيز التنفيذ:
sudo pkill delugeddeluged
في هذه المرحلة ، يكون برنامج Deluge الخفي جاهزًا للوصول عن بُعد. توجه إلى جهاز الكمبيوتر العادي (وليس Raspberry Pi) وقم بتثبيت برنامج Deluge لسطح المكتب. ستجد المثبت لنظام التشغيل الخاص بك في صفحة Deluge Downloads. بمجرد تثبيت Deluge على جهاز الكمبيوتر الخاص بك ، قم بتشغيله لأول مرة ؛ نحتاج إلى إجراء بعض التغييرات السريعة.
بمجرد التشغيل ، انتقل إلى التفضيلات> الواجهة. ضمن القائمة الفرعية للواجهة ، سترى مربع اختيار لـ "الوضع الكلاسيكي". بشكل افتراضي يتم فحصه. قم بإلغاء تحديده.

Click OK and then restart the Deluge desktop client. This time, when Deluge starts, it will present you with the Connection Manager. Click the “Add” button and then input the IP address of the Raspberry Pi on your network, as well as the username and password you set during the earlier configuration. Leave the port at the default 58846. Click Add.

Back in the Connection Manager, you’ll see the entry for the Raspberry Pi; if all goes well, the indicator light will turn green like so:

Click Connect, and you’ll be kicked into the interface, connected to the remote machine:

It’s a fresh install, nary a .torrent in site, but our connection between the remote machine and the desktop client is a success!
Go ahead and configure the WebUI now (if you wish to do so), or skip down to the next step of this tutorial.
Option Two: Set Up Deluge for WebUI Access
Configuring the WebUI is significantly faster, and allows for using some mobile apps to access Deluge. But as we mentioned before, you’ll have access to fewer features than with the full ThinClient experience. For example, ThinClient can associate .torrent files with the Deluge ThinClient for automatic transfer to the Pi, but you can’t do this with the WebUI.
First, take a moment to update and upgrade your repositories. Open a Terminal and run the following two commands, one after the other:
sudo apt-get updatesudo apt-get upgrade
Then, to install the WebUI, run the following commands. Note: If you already installed the Deluge daemon in the ThinClient section of the tutorial, skip the first command here.
sudo apt-get install delugedsudo apt-get install python-makosudo apt-get install deluge-webdeluge-web
This sequence installs the Deluge daemon (if you didn’t already install it in the last section), Mako (a template gallery for Python that the WebUI needs), the WebUI itself, and then starts the WebUI program.
The default port for the WebUI is 8112. If you wish to change it, run the following commands:
sudo pkill deluge-webnano ~/.config/deluge/web.conf
This stops the WebUI and opens up the configuration file for it. Use nano to edit the line: “port”: 8112, and replace the 8112 with any port number above 1000 (as 1-1000 are reserved by the system).
Once you have the WebUI up and running, it’s time to connect to it using a web browser. You can use a browser on the Pi if you ever need to, but it’s not the most pleasant user experience and best left for emergencies. Open up a browser on your regular desktop machine and point it at the IP address of your Pi with the port you just chose (e.g. //192.168.1.13:8112 ).
You’ll be greeted with a password prompt (the default password is “deluge”) and be immediately encouraged to change it after you enter it for the first time. After that, you’ll be able to interact with Deluge via the lightweight interface.

It’s not quite the same as the ThinClient, but it’s robust enough for light use and has the added benefit of serving as the point of connection for lots of torrent-control mobile apps.
Step Two: Configure Your Proxy or VPN
You might be tempted to start downloading torrents now,but wait! Don’t do that yet. It’s absolutely reckless to use a BitTorrent Client without first shuttling your connection through a proxy server or VPN.
RELATED:How to Choose the Best VPN Service for Your Needs
If you didn’t read over How To Anonymize and Encrypt Your BitTorrent Traffic yet, now is the time to do so. Read over the first section (for a better understanding of why it is important to protect your BitTorrent connection), and then sign up for a proxy service or, better yet, a good VPN before continuing on.
If you’re using a VPN, it’s pretty simple: Just choose a VPN that offers a Linux client. Then, download and install the Linux client on your Pi, start it up, and connect to your desired server. (You may even want to set it to launch when the Raspberry Pi boots, so it’s always connected to the VPN.)
If you’re using a proxy, you can plug its information into Deluge under Preferences > Proxy. You need to fill out the Peer, Web Seed, Tracker, and DHT sections like so, placing your proxy username and password in the appropriate slots. Your proxy service’s Type, Host, and Port may differ, so be sure to check its documentation.

In order for the proxy settings to take effect, you need to restart the Deluge daemon. From the terminal enter the following commands:
sudo pkill delugeddeluged
After that, you should be all set.
The best way to test that you’re actively using the proxy or VPN is to download a torrent file designed expressly to report back its IP address. You can find many of these torrents online, including this one from BTGuard and this one from TorGuard. Load either or both torrents into Deluge and wait a moment.

After the torrents have had a chance to connect to their respective trackers, select the torrents in the Deluge client and check the “Tracker Status” entry as seen above. Both will report the IP address they detect from your client. If that IP address matches your public IP address, then the proxy or VPN is not configured properly and you should return to the previous section to check your configuration. If it is configured properly, you’ll see the proxy or VPN’s IP address and not your own.
Step Three: Configure Your Download Location
Next, you’ll need to configure Deluge to use your external hard drive. If you followed along with the hard drive mounting instructions in this previously mentioned guide, you’re ready with a hard drive set to auto-mount on boot.
From there, all you need to do is change the default locations in Deluge. Navigate to Deluge’s Preferences and head to the Downloads tab. By default, Deluge directs everything to /home/pi. That little SD card is going to fill up real fast, however, so we need to change it.
First, we’re going to create some new folders in /media/USBHDD1/shares, which is the share folder we already set up in the Low-Power Network Storage tutorial. That way, we can easily access our downloaded torrents over the network and have a network accessible watch folder for auto-loading torrent files. Use the following commands to create the folder set (adjusting the pathnames accordingly for your location if you’re not using the same Pi setup from the previous tutorial like we are):
sudo mkdir /media/USBHDD1/shares/torrents/downloading sudo mkdir /media/USBHDD1/shares/torrents/completed sudo mkdir /media/USBHDD1/shares/torrents/watch sudo mkdir /media/USBHDD1/shares/torrents/torrent-backupsThen, turn right around and plug those four new directories into Deluge.

Click OK to set the directories. There’s no need to restart as you did with the proxy setup.
Step Four: Test Your Connection
Now it’s time to download a large enough torrent that we can really see if the system is running smoothly. For our test we grabbed the .torrent file for the current Linux Mint distribution–it weighs in at solid 1.7GB, perfect for monitoring the connection speeds.

Once you’ve confirmed that your connection is stable and the Linux torrent is humming along nicely, it’s time to move onto the next step: automating the client startup.
Step Five: Configure Deluge to Run on Startup
Before we leave the Deluge setup, there is one final detail to attend to. We need to set up the Deluge daemon and WebUI to run automatically when our Raspberry Pi boots up. To do so simply and without the fuss of editing more complicated init files and settings, we’ll simple annotate the rc.local file. Run the following command in a Terminal to do so.
sudo nano /etc/rc.local
With the rc.local file loaded, add the following lines to the end of the file. Note: you do not need to add the the second command ending in “deluge-web” if you are not using the WebGUI. This may also be a good place to add your VPN program, if you’re using one.
# Start Deluge on boot: sudo -u pi /usr/bin/python /usr/bin/deluged sudo -u pi /usr/bin/python /usr/bin/deluge-web
Your rc.local file should look something like this when you’re done (possibly with the addition of that VPN):

Press Ctrl+X to exit and save your work.
At this point, we would recommend restarting your Raspberry Pi, so fire off a “sudo reboot” at the command line. Once the Pi has finished rebooting, head to your other PC and try to connect to the Deluge ThinClient and/or WebUI to make sure they both work.
There are two major errors you may encounter here. First, a failure to connect at all means that the initialization scripts didn’t work. Open up the terminal on your Pi and manually start the daemon and WebUI using the commands we learned earlier in the tutorial. Check to see that it works now. If it does, go back up and fix your rc.local script.
Second, if you can open up the client, but it shows permission errors for your existing torrents (like the Linux torrent we used to test things earlier), that indicates that your external hard drive was not mounted, or mounted incorrectly. Review the sections on installing an external drive and setting it to auto-mount on boot in our Low-Power Network Storage tutorial.
Enhancing Your Torrenting Experience
Now that you have your torrent box configured and ready to rock, there are a few additional tools and modifications you can look into to really enhance your user experience. None of these tips and tricks are necessary, but they do make your Raspberry Pi turned Torrent Box easier to use.
Add Mobile Access: Consider downloading a mobile control app like Transdroid and Transdrone for Android. Unfortunately we don’t have any solid suggestions for iOS users, as Apple has taken a really aggressive stance towards torrent-related apps in the App Store (and has banned any apps that slipped through the submission process).
Deluge doesn’t currently have a mobile-optimized template for the WebUI, but it’s more than functional on tablets like the iPad and Kindle Fire.
Set Up a Shared Drop Folder: Although we mentioned it briefly earlier in the tutorial, ensure that the /torrents/watch/ folder you created is accessible on your network. It’s really convenient to be able to dump a pile of .torrent files into the folder and have Deluge load them up automatically.
Install Browser Plugins: There are several Deluge-centered plugins for Chrome and Firefox that improve the user experience, including:
- Chrome:
- DelugeSiphon: Enables .torrent adding from the WebUI
- Deluge Remote: Simple view of current torrents and their progress
- Firefox:
- BitTorrent WebUI+: Enables .torrent adding from the WebUI
- WebUI Quick Add Torrent: Greasemonkey Script that adds clickable icon on webpages for easy torrent adding
Activate Deluge Plugins: There are a host of great plugins already included in Deluge, and even more third-party plugins. Some of the included plugins you may want to take advantage of include:
- Notification: You receive email alerts from Deluge on torrent completion and other events
- Scheduler: Limit bandwidth based on time of day
You can find these in Preferences > Plugins. Check the ones you want and a new entry will appear in the preferences menu (e.g. Preferences > Notifications).
For more information about third party plugins and how to install them, check out the Plugins page in the Deluge Wiki.
After configuring, testing, and tweaking enhancements and plugins, you have a more than capable torrent box that costs mere pennies a day to operate. Find a quiet and out of the way spot to plug it in, load it up with torrents, and leave it to do the heavy lifting of downloading and seeding for you.