ما هو تمهيد الشبكة (PXE) وكيف يمكنك استخدامه؟

هل احتجت في أي وقت إلى استكشاف أخطاء جهاز الكمبيوتر أو تشخيصه ونسيت مكان قرص الأداة المساعدة؟ سنوضح لك كيفية الاستفادة من تمهيد الشبكة (PXE) باستخدام FOG لجعل هذه المشكلة شيئًا من الماضي.
مصدر الصورة: h.koppdelaney
نظرة عامة على PXE
PXE (بيئة ما قبل التنفيذ) ، التي تُلفظ بمودة Pixie (كما في غبار الجنية) ، هي طريقة للحصول على تمهيد لجهاز الكمبيوتر (العميل) باستخدام بطاقة الشبكة الخاصة به فقط. تم إنشاء طريقة التمهيد هذه في عام 1999 وطالما أن الكمبيوتر المعني متصل بالشبكة (ويدعم هذا المعيار) ، فمن الممكن التحايل على إجراء التمهيد العادي (IE Power on -> BIOS -> HD / CD) وقم ببعض الأشياء الرائعة بدءًا من استكشاف الأخطاء وإصلاحها وحتى استخدام نظام التشغيل المباشر وحتى إعادة تصوير الجهاز ... لكننا نتقدم على أنفسنا ، فلنعد إلى البداية.
عند استخدام PXE ، يتم تغيير عملية التمهيد من الترتيب العادي إلى:
التشغيل -> BIOS -> مكدس PXE لبطاقة الشبكة -> تنزيل برنامج تمهيد الشبكة (NBP) باستخدام TFTP من الخادم إلى ذاكرة الوصول العشوائي للعميل -> مسؤولية NBP لأداء الخطوة التالية (المعروف أيضًا باسم تمهيد المرحلة الثانية).
باستخدام "PXElinux" NBP ، من الممكن إعداد الخادم لأكثر من برنامج تمهيد PXE واحد لعملائنا. بمعنى ما ، هو المكون السري الذي يمكننا من أداء كل ما سبق ثم بعضه. للحصول على شرح أكثر عمقًا للعملية بأكملها ، وتاريخها وبعض خيارات البنية التحتية التي تم تمكينها و gPXE (وهو ابن عم أكثر تطورًا) ، راجع هذه المحاضرة على YouTube من مطوريها. أيضًا ، يوجد أدناه مقطع فيديو لإعداد من عام 2008 يتخطى بسرعة بعض احتمالات التمهيد.
هدف
سيكون هذا الدليل هو الأول من سلسلة أدلة حول PXEing. في هذا الدليل ، سنضع الأسس التي سنبني عليها في المقالات المستقبلية.
التوصيات والافتراضات والمتطلبات
- يدعم جهاز العميل الذي تختبره تشغيل PXE وأنت تعرف كيفية تمكينه.
- تمت كتابة هذا الدليل واختباره باستخدام Debian Squeeze و Ubuntu server 9.10 و Linux Mint10. لذلك يُفترض أن لديك نظامًا قائمًا على دبيان للعمل معه أيضًا.
- قد ترغب في إلقاء نظرة على كيفية إعداد برنامج RAID لخادم ملفات بسيط وكيفية إعداد تجميع ارتباط الشبكة (802.3ad) ، لأن متطلبات النطاق الترددي للقرص والشبكة على هذا النوع من الخوادم يمكن أن تحصل بسرعة حقيقية عالية. يوصى بشدة بالبناء على أساس خادم يتمتع بمرونة عالية لشبكته وأنظمته الفرعية على القرص.
- سترونني أستخدم VIM كبرنامج محرر ، هذا فقط لأنني معتاد عليه ... يمكنك استخدام أي محرر آخر تريده.
التركيب - الرفع الثقيل عن طريق الاستفادة من الضباب
FOG هو حل مجاني لاستنساخ الكمبيوتر مفتوح المصدر تم إنشاؤه بواسطة * Chuck Syperski و Jian Zhang. يأخذ FOG البرامج المتاحة بانتظام (مثل Apache و MySQL و tftpd-hpa على سبيل المثال لا الحصر) ويجمعها في حل إدارة دورة حياة الكمبيوتر الشخصي (PCLM) المجاني والمنتج. باستخدام PCLM المجاني هذا ، من الممكن إجراء نسخ احتياطي لحالة أجهزة الكمبيوتر عن طريق تصويرها ونشر البرامج والإعدادات (IE Firefox و Office والطابعات وما إلى ذلك) وسياسات التكوين (إعدادات تسجيل الخروج التلقائي وشاشة التوقف في IE) على سبيل المثال لا الحصر ، من خلال واحد واجهة الويب المركزية.
ملاحظة : مقابلة مع تشاك وجيان حول FOG متاحة في Tightwad Tech.
يعد استخدام FOG كأساس لخادم PXE اختصارًا رائعًا للحصول على جميع الأجزاء الضرورية مثل TFTP وإذا لزم الأمر ، DHCP في مكانه دون الحاجة إلى تثبيتها وتكوينها يدويًا ، مع منحك جميع وظائف FOG كمكافأة .
نظرًا لأن هدفنا هو إضافة وظائف إلى هذا النظام الرائع بالفعل ، فلن نغطي كيفية استخدام FOG نفسه ، ولا إجراءات التثبيت الخاصة به بعمق. يعد ويكي FOG ، بكيفية كتابته وفيديوهاته ، قويًا بما يكفي للحصول على معلومات متعمقة ، إذا كنت ترغب في الاطلاع عليها. الخطوات الموجزة هي:
sudo mkdir -p /opt/fog-setupDownload the latest FOG packagefrom sourceforge to the directory created in the previous step.Extract the package and start the installation.sudo tar -xvzf fog*You will be prompted several times by the installer:
3. What is the IP address to be used by this FOG Server? [server-IP-detected-on-eth0] – Enter.
10. Acknowledge and follow the on screen instructions for “MySQL“.
11. Leave the MySQL password blank for the root account.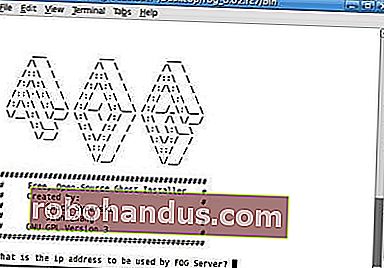
Image from the FOG wiki.Go to the Fog address with your browser and follow the on screen instructions.

*Note: Assuming you do NOT have another DHCP or that it is not setup to handle PXE. If you want to configure your existing DHCP, see Configure DHCP for PXE.
As far as installing FOG goes, that should be it. Again, while FOG is a great system, using it, is not the focus of this guide, and we encourage you to head over to it’s wiki so you can get a better grasp of FOG’s abilities and how it can help you to manage your clients lifecycle.
If all when well you should be able to PXE boot your client machine (usually F12) and get greeted by FOG’s default menu.

As a quick “taste of things to come” you may select the “Run Memtest86+” option and get greeted by the Memtest program we covered in our “Diagnose PC Hardware Problems with an Ubuntu Live CD” guide.
File and directory Structures
As stated earlier, our aim is to extend FOG’s abilities and to that end we will need to add some files and directories.
Create the subdirectory structure:
sudo mkdir -p /tftpboot/howtogeek/menus
These sub-directories will serve as templates for all the pictures, programs and configurations we will use to extend FOG.
Adjusting the “default” configuration file
We will build a new main menu, and put all of the FOG functions into their own sub-menu.
Copy the /tftpboot/pxelinux.cfg/default configuration file into howtogeek/menus/fog.cfg
sudo cp /tftpboot/pxelinux.cfg/default /tftpboot/howtogeek/menus/fog.cfg
Now edit the content of the original “default” file:
sudo vim /tftpboot/pxelinux.cfg/default
Make its content look like this:
DEFAULT vesamenu.c32
LABEL FOG
KERNEL vesamenu.c32
APPEND howtogeek/menus/fog.cfg
LABEL Utils MENU
LABEL Linux
LABEL fog.local
When we finish, this configuration will give you 3 sub-menus: “Utilities”, “Manual FOGing”, “Linux stuff”.
Create the “master” file
The master file allows us to make global changes to the look and feel of the menus without reentering them individually over and over. Things like the default background picture, border stile, position Etc’, will all be consolidated in this master.cfg file.
Create the file:
sudo vim /tftpboot/pxelinux.cfg/master.cfg
Make it’s content look like:
MENU BACKGROUND fog/genie.png
MENU MARGIN 0
The configuration above, will create the purple borders and highlighting, if you whish to have a different look and feel, simply change the values.
To set a background picture, put a picture in the “/tftproot” directory and point the “MENU BACKGROUND” to the picture’s relative path (we recommend using pictures with resolution of 640*480). For example the full path for the above configured picture would be: “/tftproot/fog/bg.png“.
Connect the FOG sub-menu to the main menu
Because we made a simple copy of the original configuration file into the menus sub-directory (keeping its color schema, timeouts and alike), if you go into this sub-menu now from the PXE booted client, it would work, but you will not be able to return to the main menu without rebooting the machine.
So edit the /tftpboot/howtogeek/menus/fog.cfg file:
sudo vim /tftpboot/howtogeek/menus/fog.cfg
Add this entry after the “menu color title” entry and before the FOG functions:
LABEL back
Create the sub menu skeletons
We have created 4 sub-menus, three of them are up to us to fill. To do so, lets create the template that we will be building on.
Create the template file:
sudo vim /tftpboot/howtogeek/menus/template.cfg
Make this its content:
MENU INCLUDE /pxelinux.cfg/master.cfg
Lets set the stage for additional sub-menus, which will be covered in future guides:
cd /tftpboot/howtogeek/menus/
That’s it, the basic layout is now ready and from now on, we only need to build upon it, which we will in future guides. Until these future guides arrive, you are encouraged to get familiar with FOG as it is an exciting ride upon it’s self.
Update: The future is here :)
How To Network Boot (PXE) The Ubuntu LiveCD
Go FOG yourself 
Original text